After you upload your feed, you can move on to adding custom attributes and creating segments. Attributes and segments will allow you to modify your feed data so that you can later create campaigns based on the segments and attributes in your feed.
There are several reasons why you would need to add a your own custom attribute. For example, if you are a bike shop and want to create a sale on your bikes for the winter months, you can add an attribute for the sale price on all your bikes that marks them down 20%.
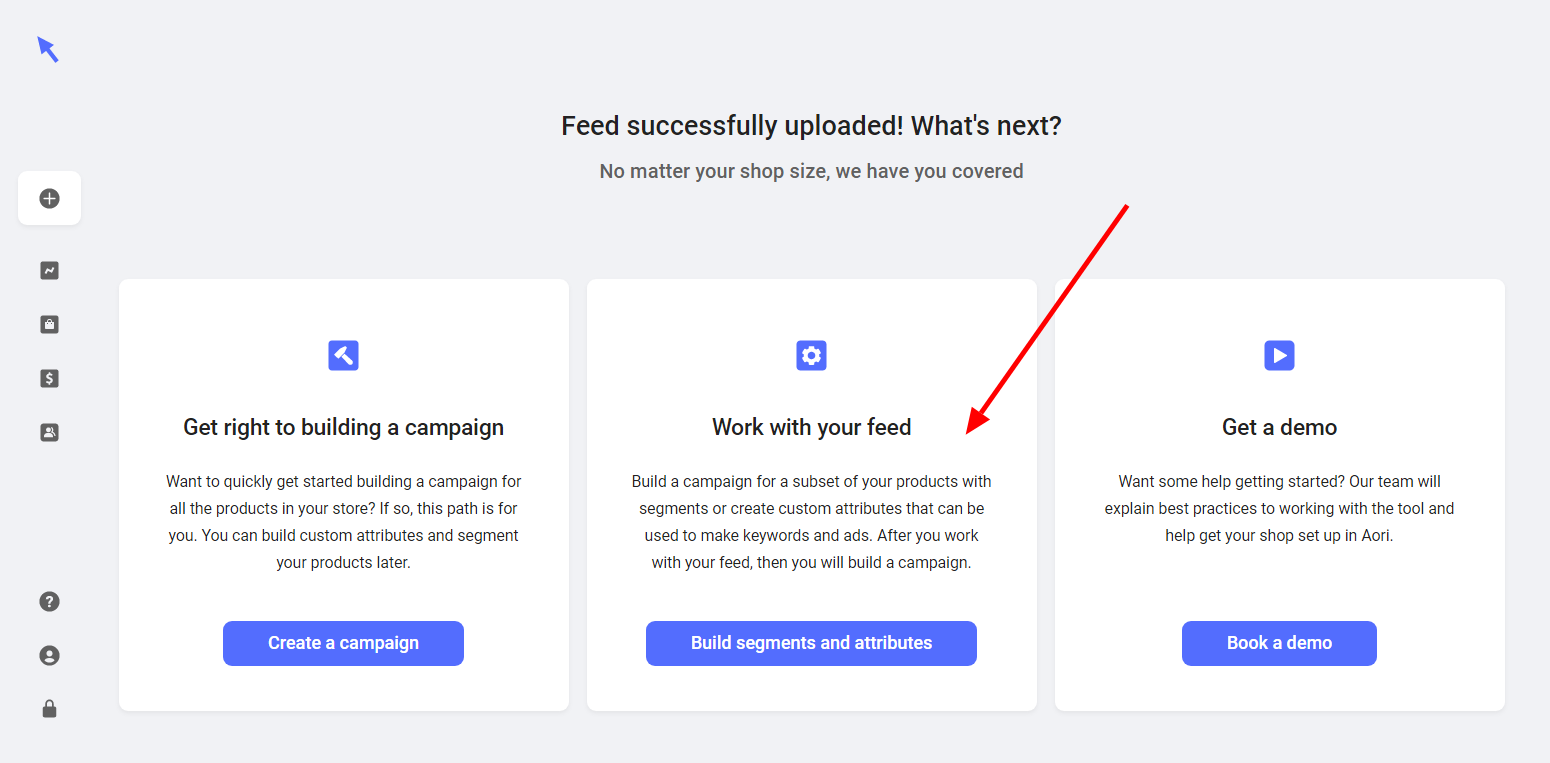
Let's take a look at the example below to see how that would work in Aori. After you upload your feed, you will be shown a screen where you can jump into creating campaigns right away, modify your segments and attributes or request a demo where our team can help you set up the campaigns together. You want to choose the middle option.
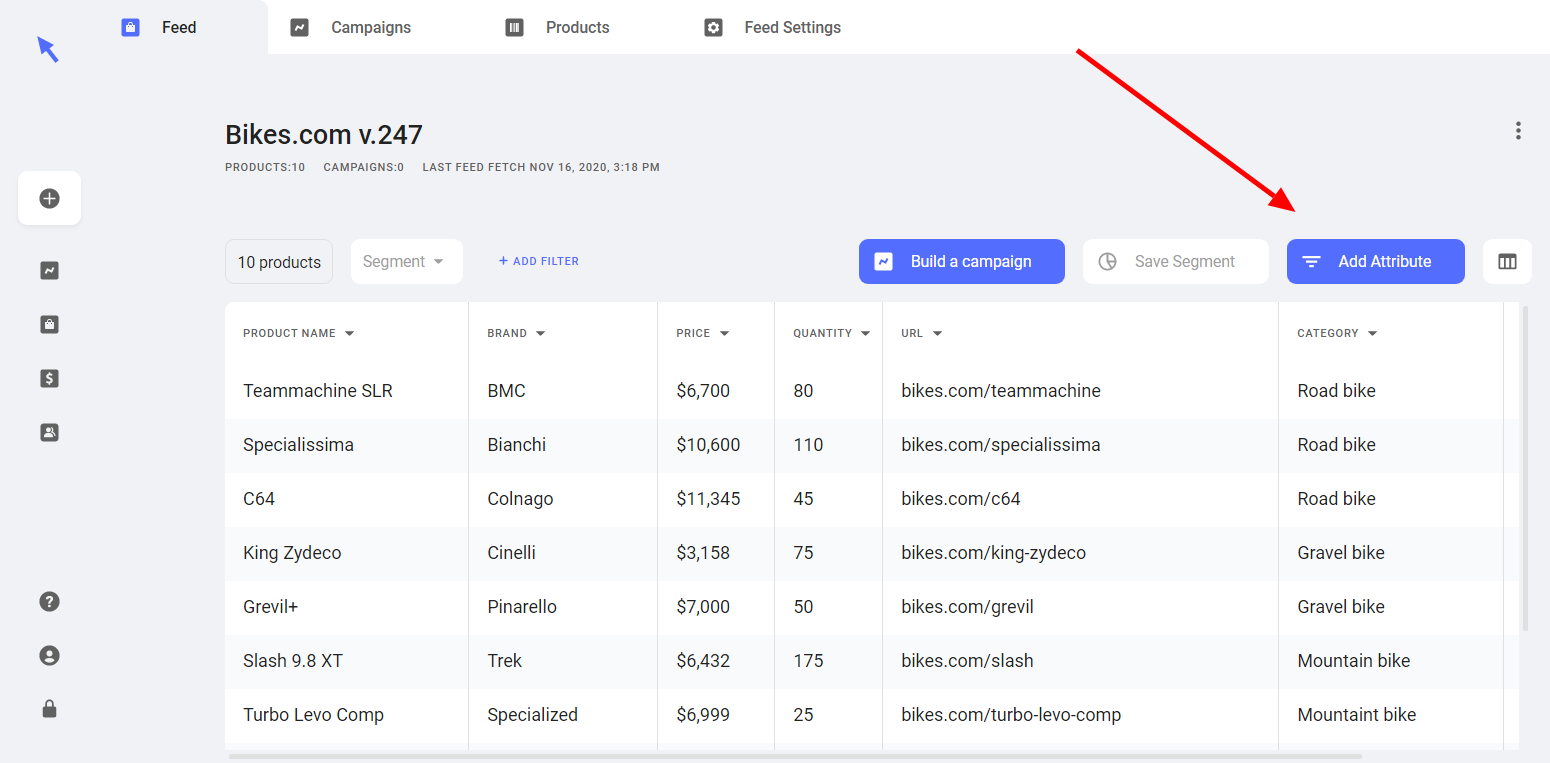
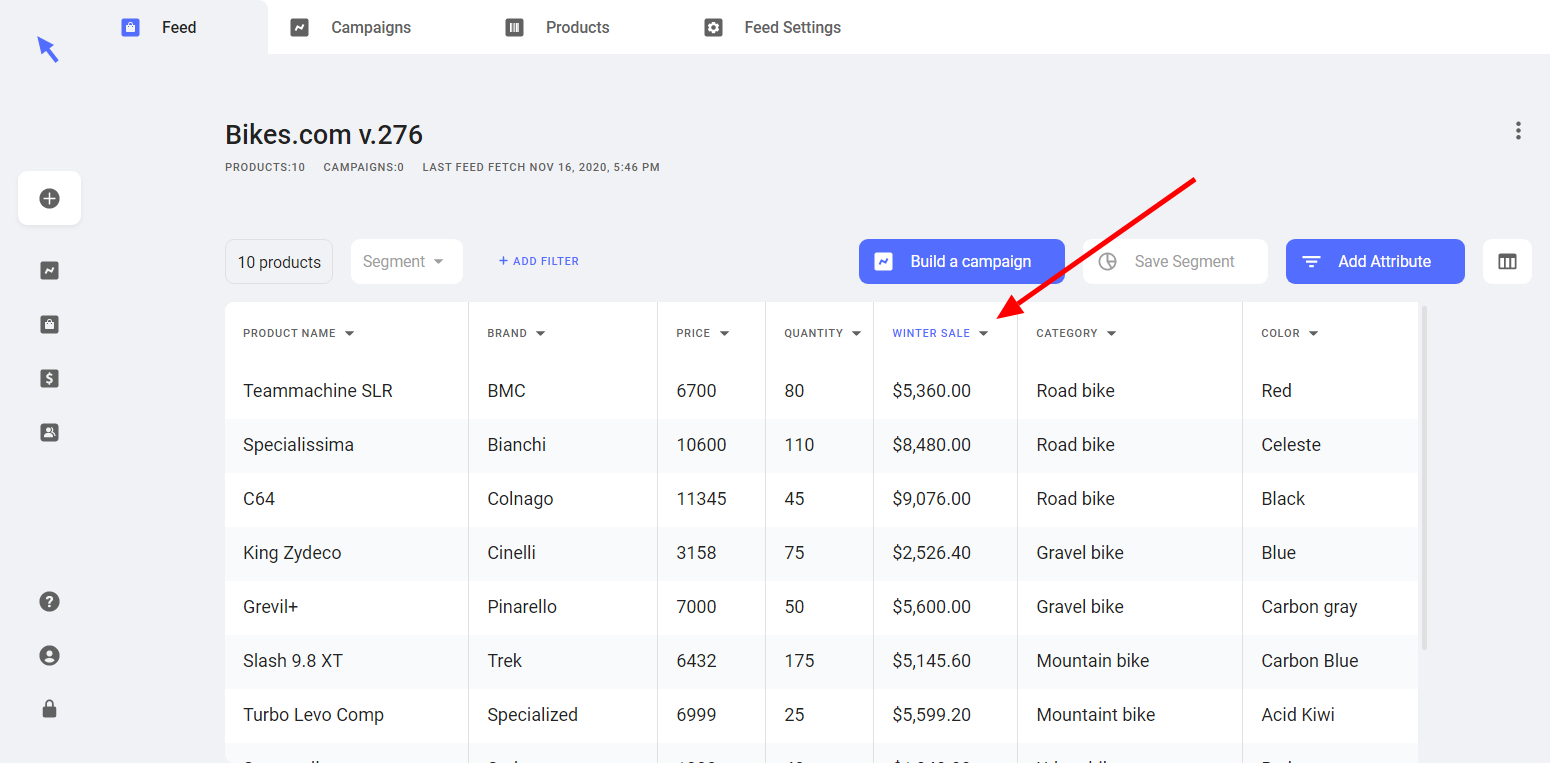
This will take you to the dashboard where you can view your feed. To add an attribute, just click on the blue button that says 'add attribute'.
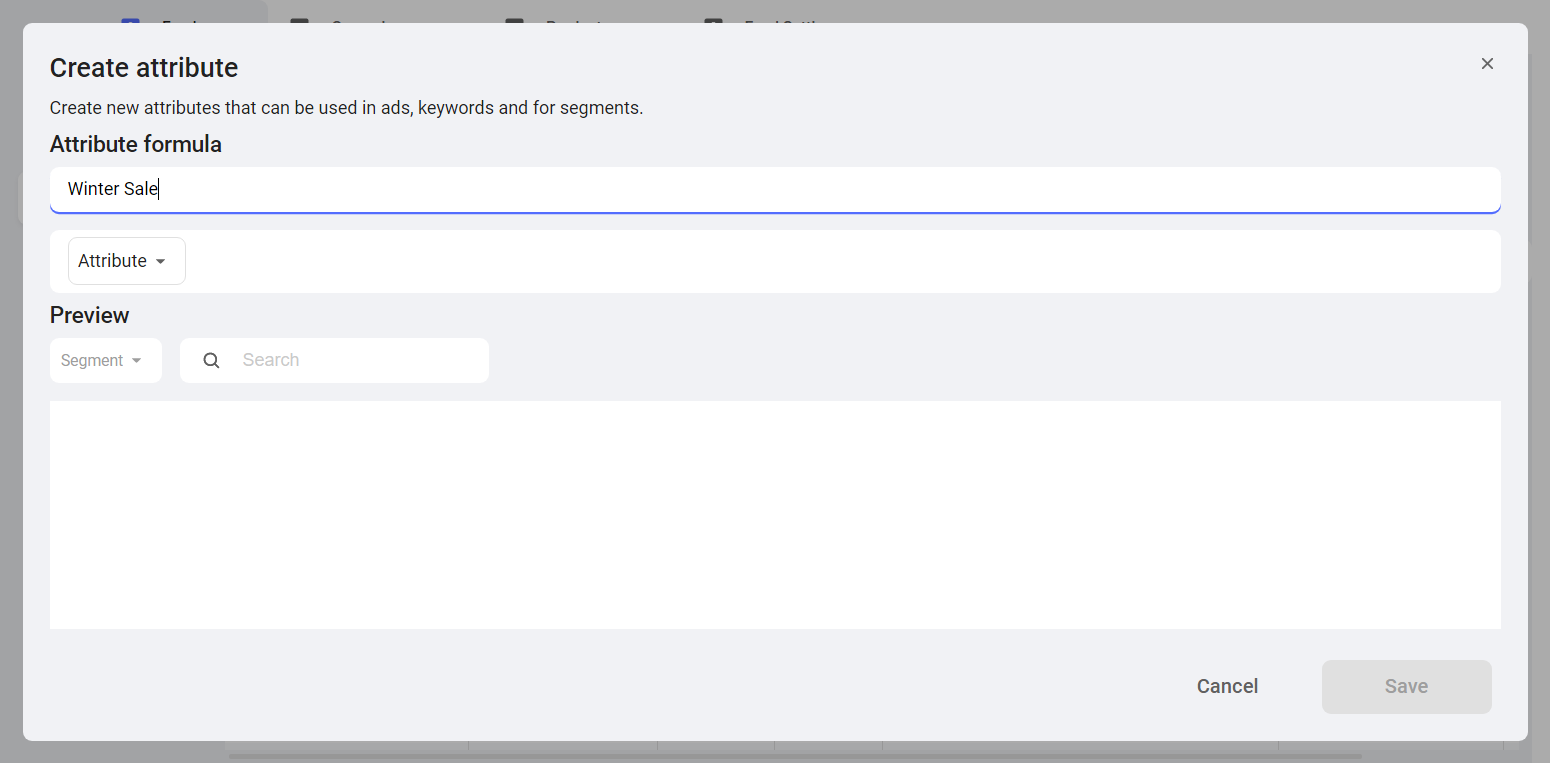
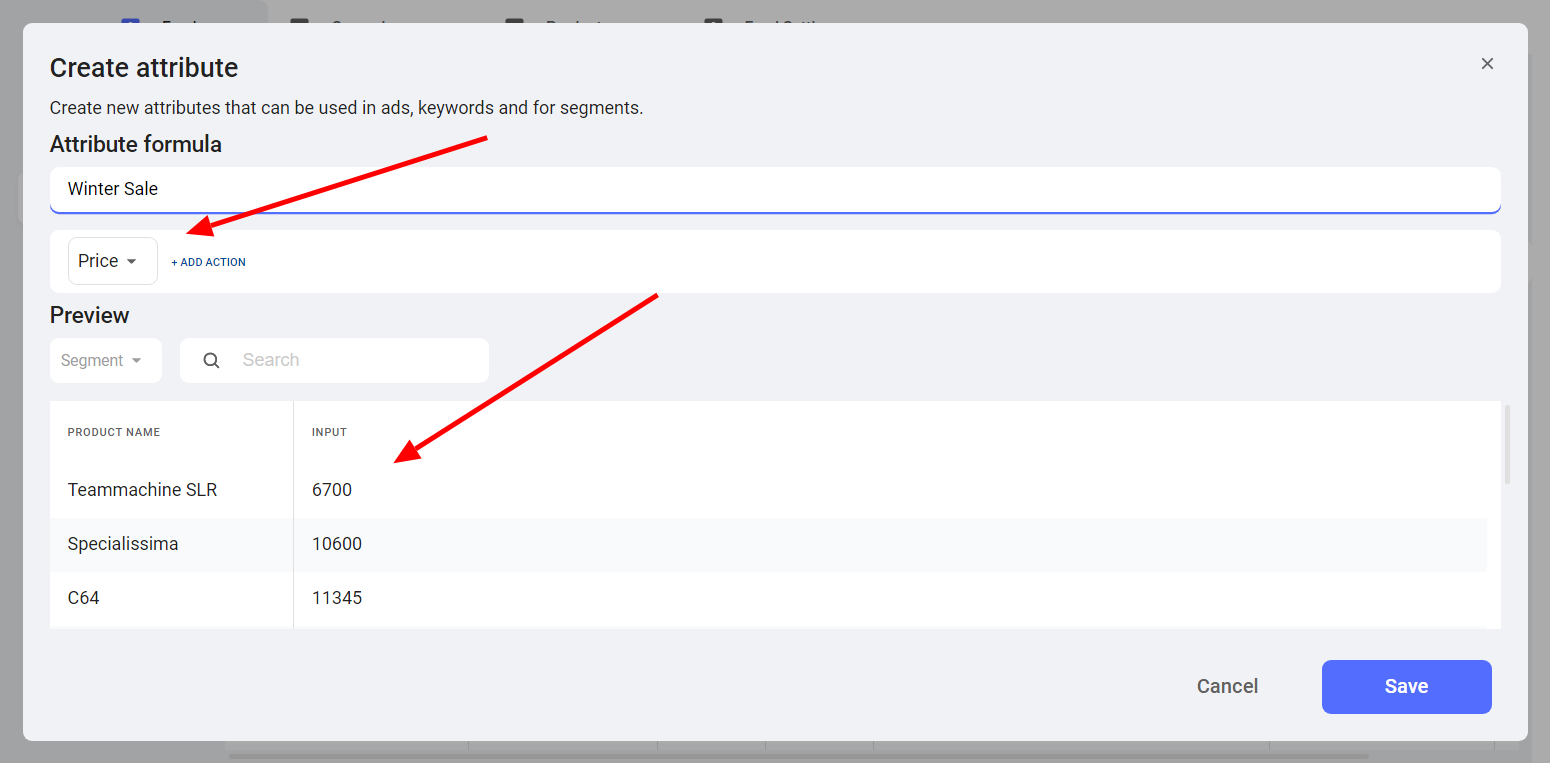
You will then be taken to the Attribute Formula page where you can create a custom attribute. Here you can give your attribute a name, like 'winter sale' and create a formula that will use your feed information to create the new attribute.
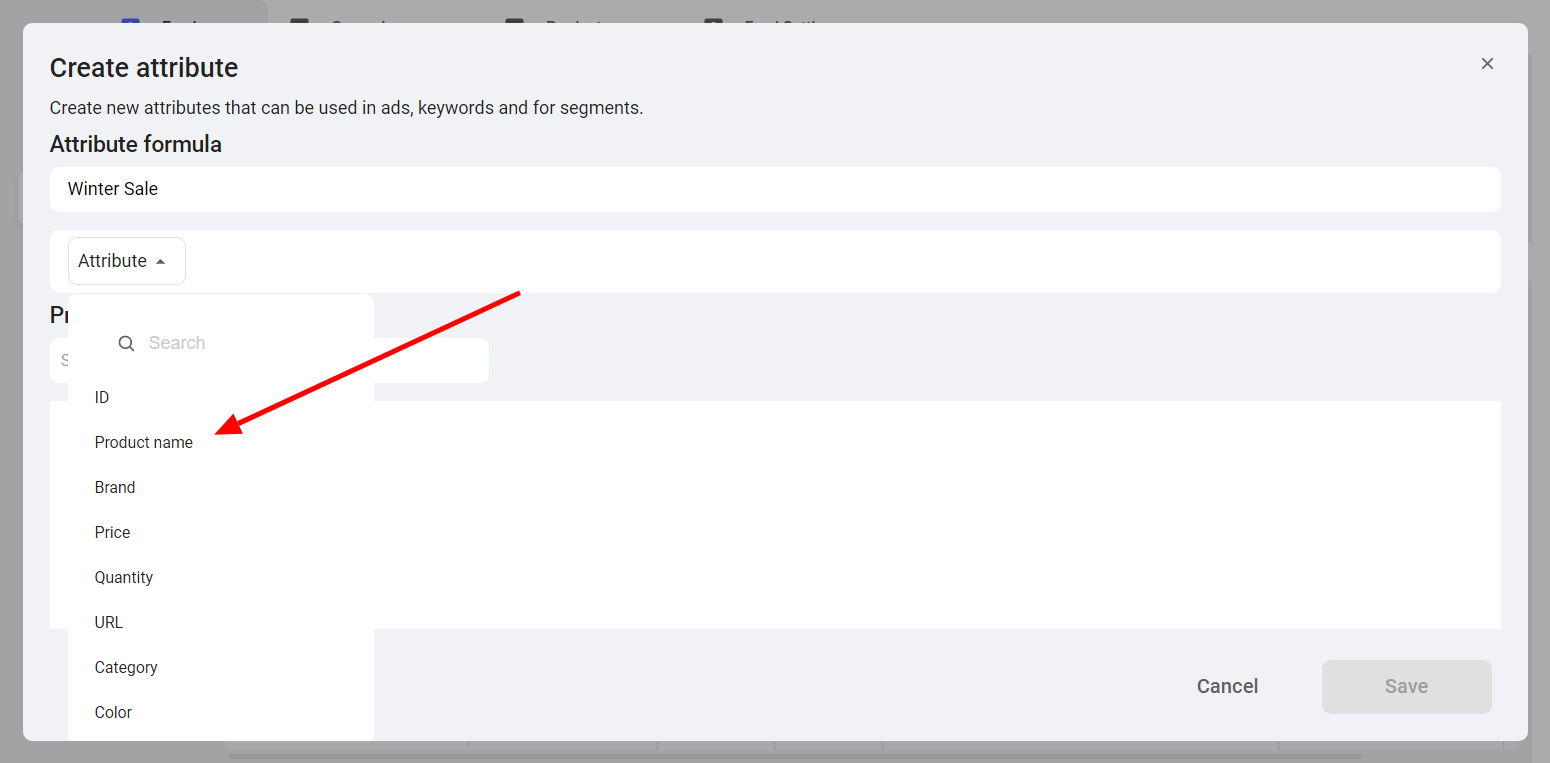
To create an attribute formula, click on 'Attribute' on the far left side, which will take you to a drop-down menu that will give you options to combine feed data from the previous menu to create a new attribute.
Various data can be combined to create new attributes. To create a winter sale for bikes, you would click on 'price'. This will give you all your products with their prices in numerical value shown next to them.
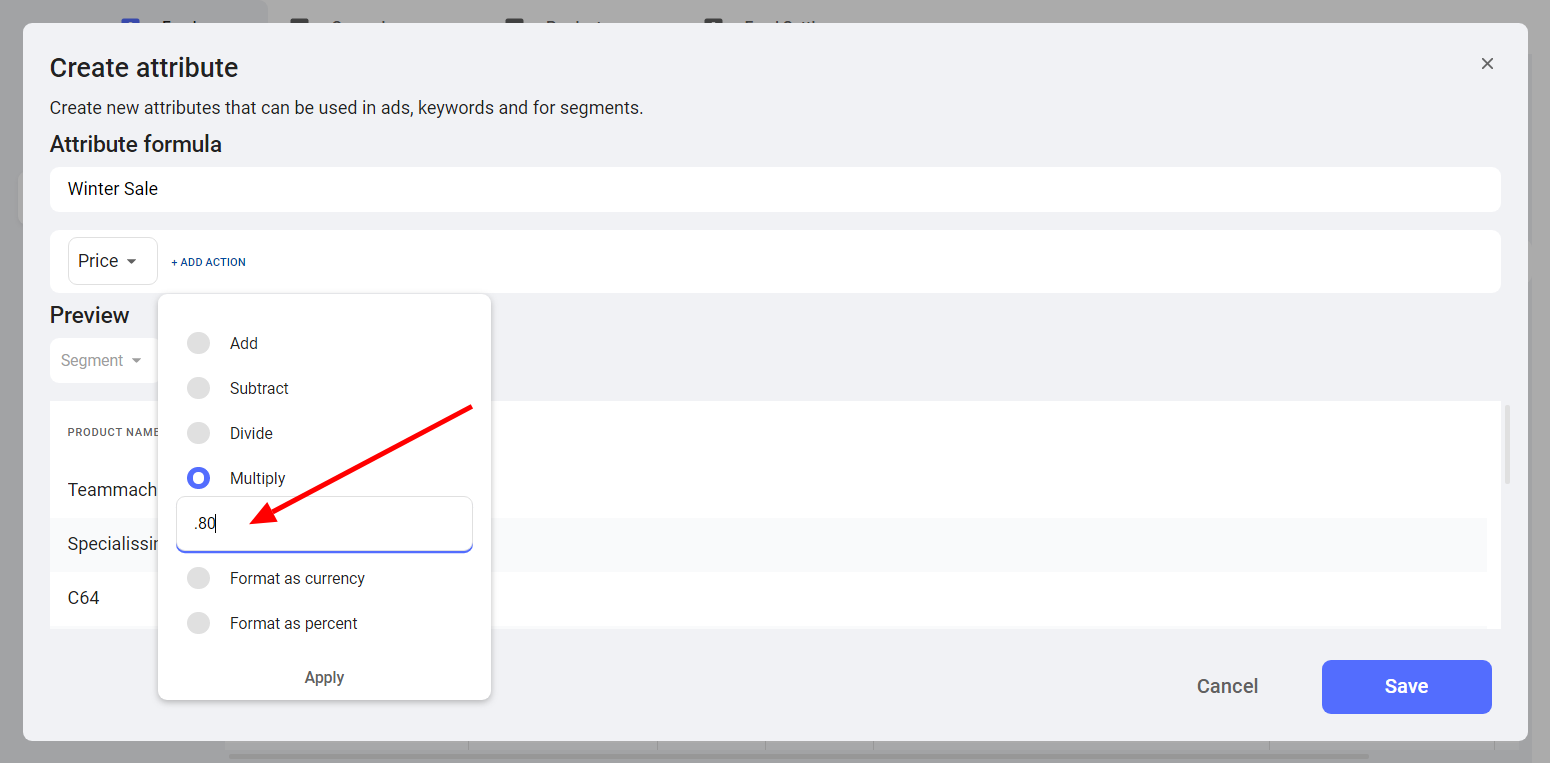
You then click on 'add action' and 'multiply' to give you a new value for the sale price. In this case, we gave a 20% sale, so we multiplied by 0.80.
Aori will then show you the new sales price, which you can then format as a currency to create a brand new attribute known as 'Winter Sale' with a 20% sale price on all your bikes for the winter.
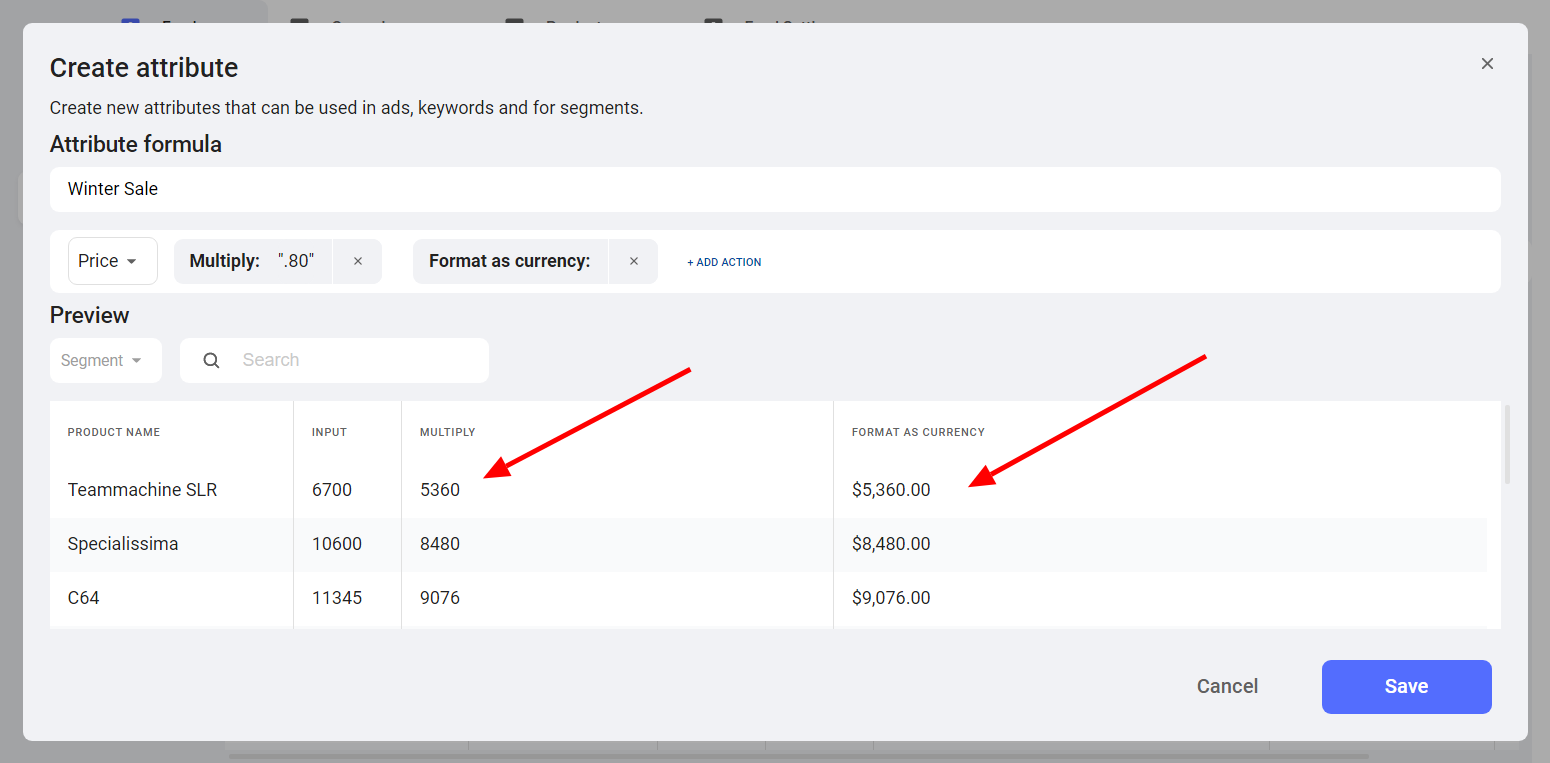
When you are done, just click Save. This will take you back to your feed and you will be able to see all your bikes with a sale price next to them.
It's important to note that in the example above we were working with numerical data. You can also create attributes using text data, such as altering product titles. When you work to create a text attribute, you will be given different actions for the attribute formula. Instead of 'multiply', 'add', 'subtract', you will be given actions such as "find and replace", "merge" and "remove colors".
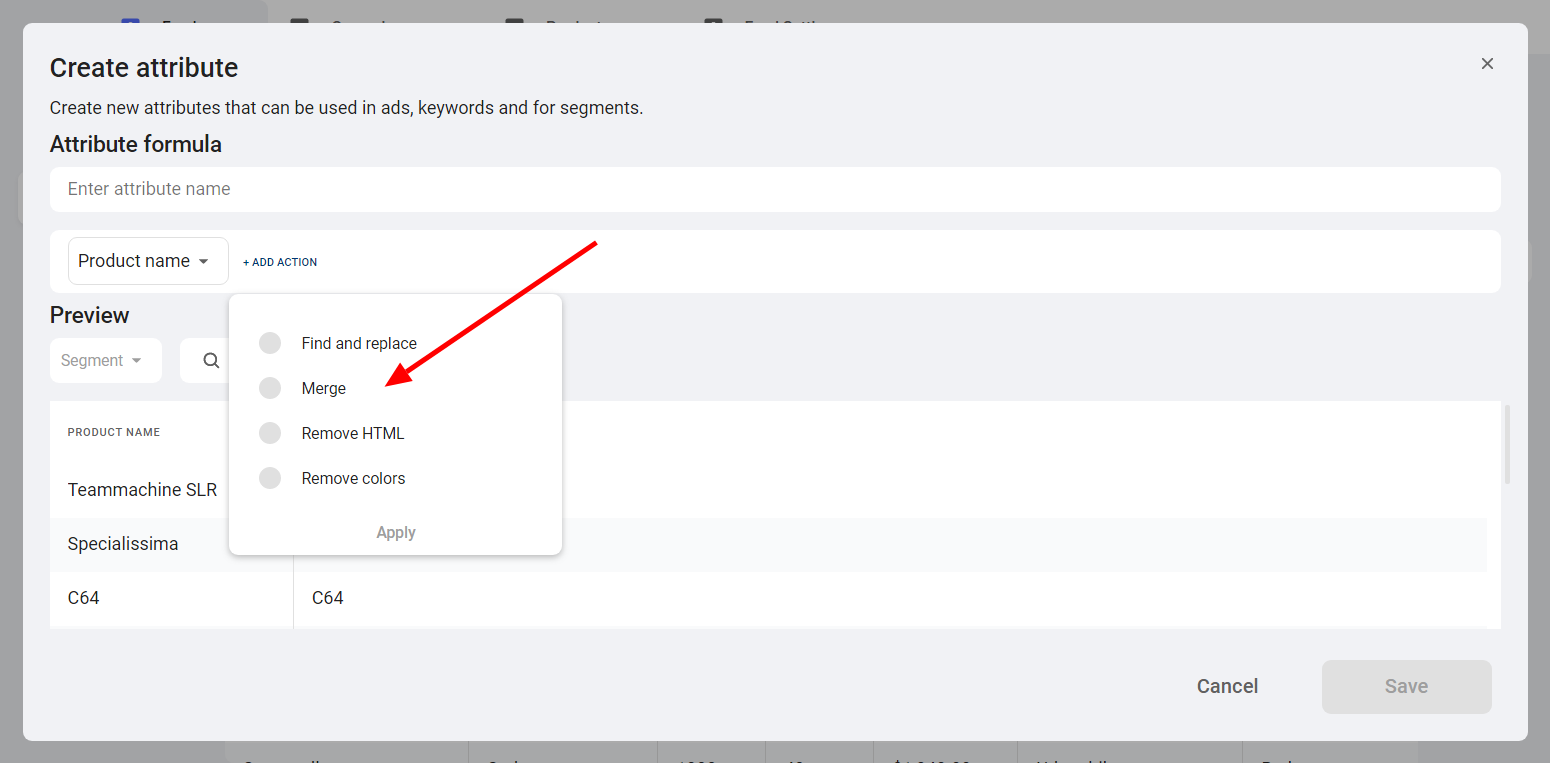
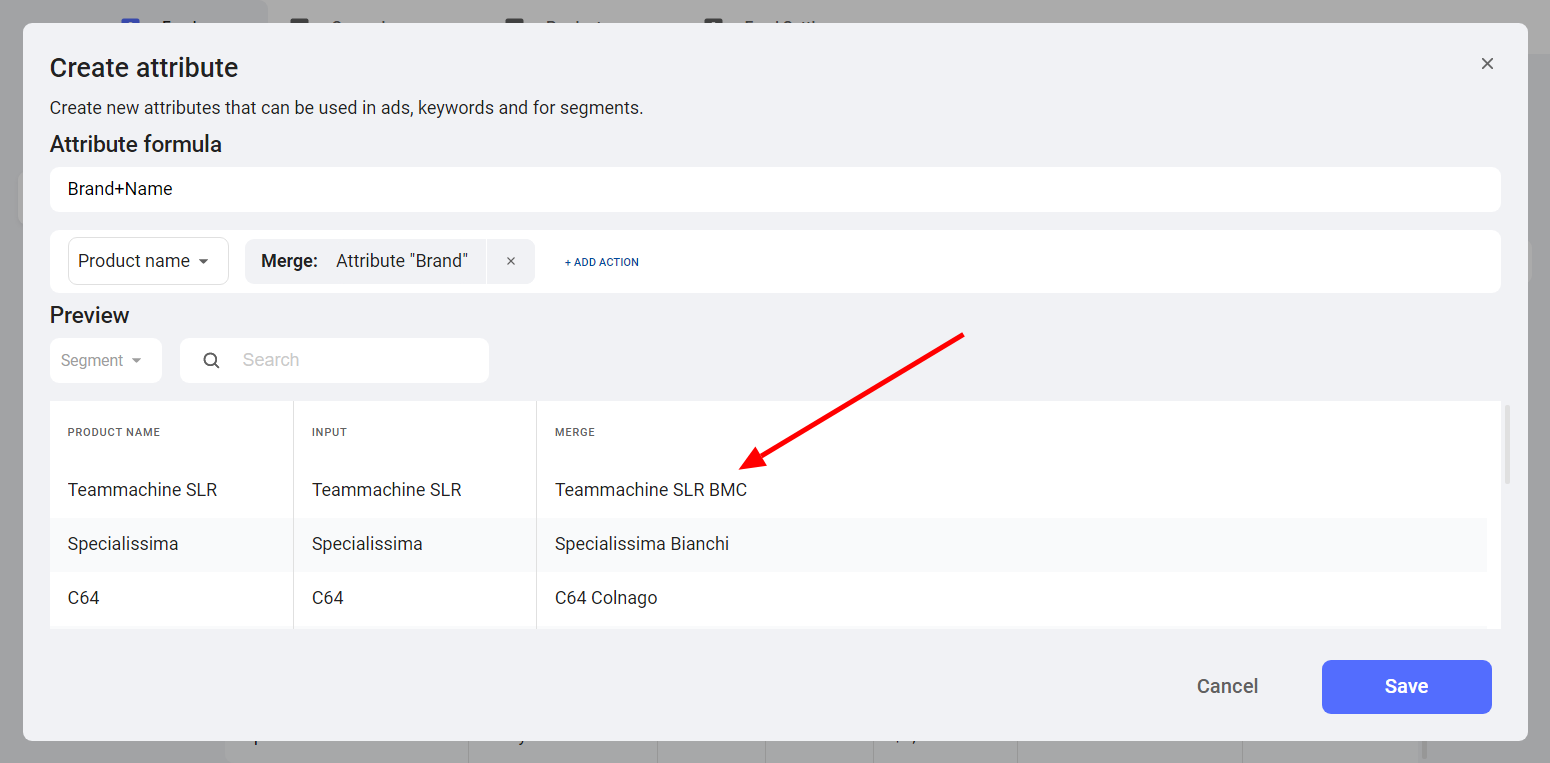
For example, if you'd like to create an attribute that includes the type of bike plus the brand name, you could merge the two attributes together to create a new custom attribute called 'brand+name'.
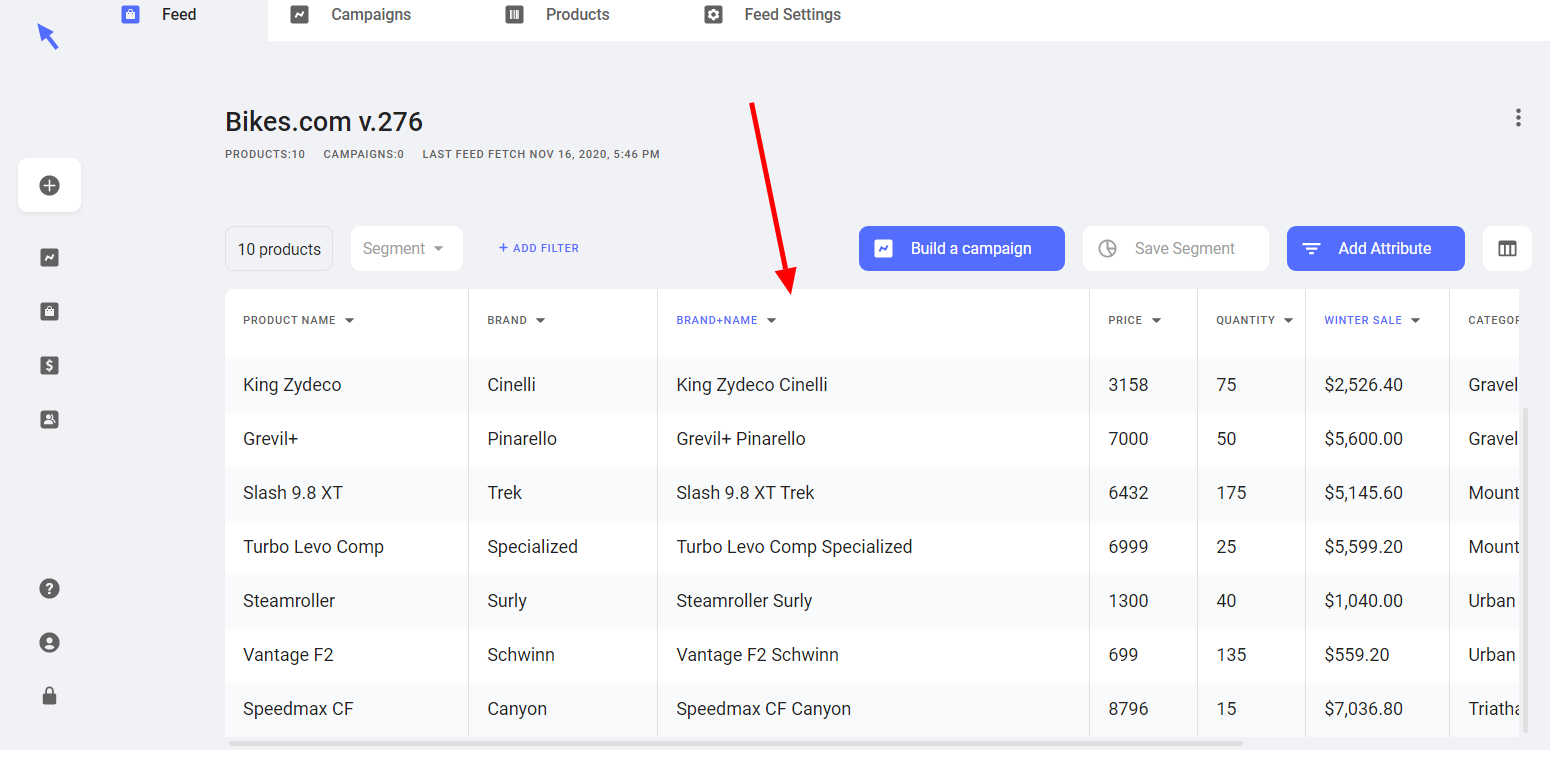
This will then appear in your dashboard like this.
It is important to note that once you create an attribute, you can no longer delete it. This has to do with the way that Aori uses this data later to create text campaigns. If you find that your feed is getting cluttered with too many attributes, you can alter which attributes you want to show on your feed page by clicking on the 'view' menu in the far right corner.

Aori will automatically pull in some data here from your feed to show you. But you have the control to uncheck any of attributes you want to see or not.
If you find that you have too many attributes, just uncheck the old ones you don't need anymore, and Aori will show you only the attributes that you find important.
Now that we have created an attribute, we can move on to creating segments.
Remember, the purpose of Aori's ecomm tool is to easily create text ads in Google Ads for your products. However, very rarely will a store create one campaign for all of their products, especially for bigger stores with lots of variety. Instead it is best practice to create campaigns for particular segments of your products. Following along with our bike example, a bike store may decide to create a separate campaign for its road bikes, and a separate campaign for its mountain bikes. In our case, we will create a separate campaign for a winter sale.
To create a segment, you want to start by clicking 'add filter'. You will then be given the different filters you can use. Just like with attributes, numeric values and text values will be given different filter options.
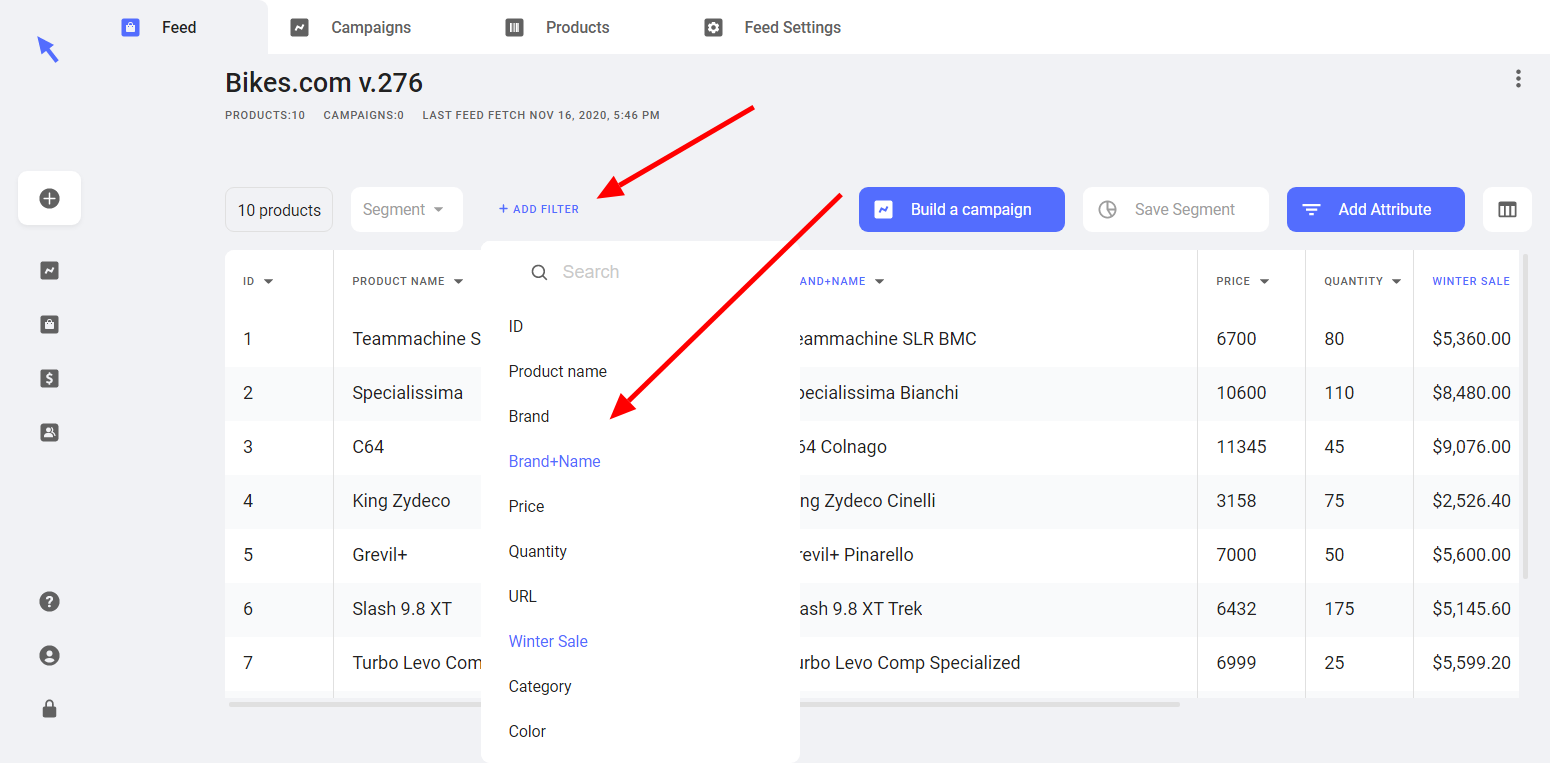
As a note, the filter options in black are attributes that were pulled in from your original feed source, while filter options in blue are custom attributes you created in Aori.
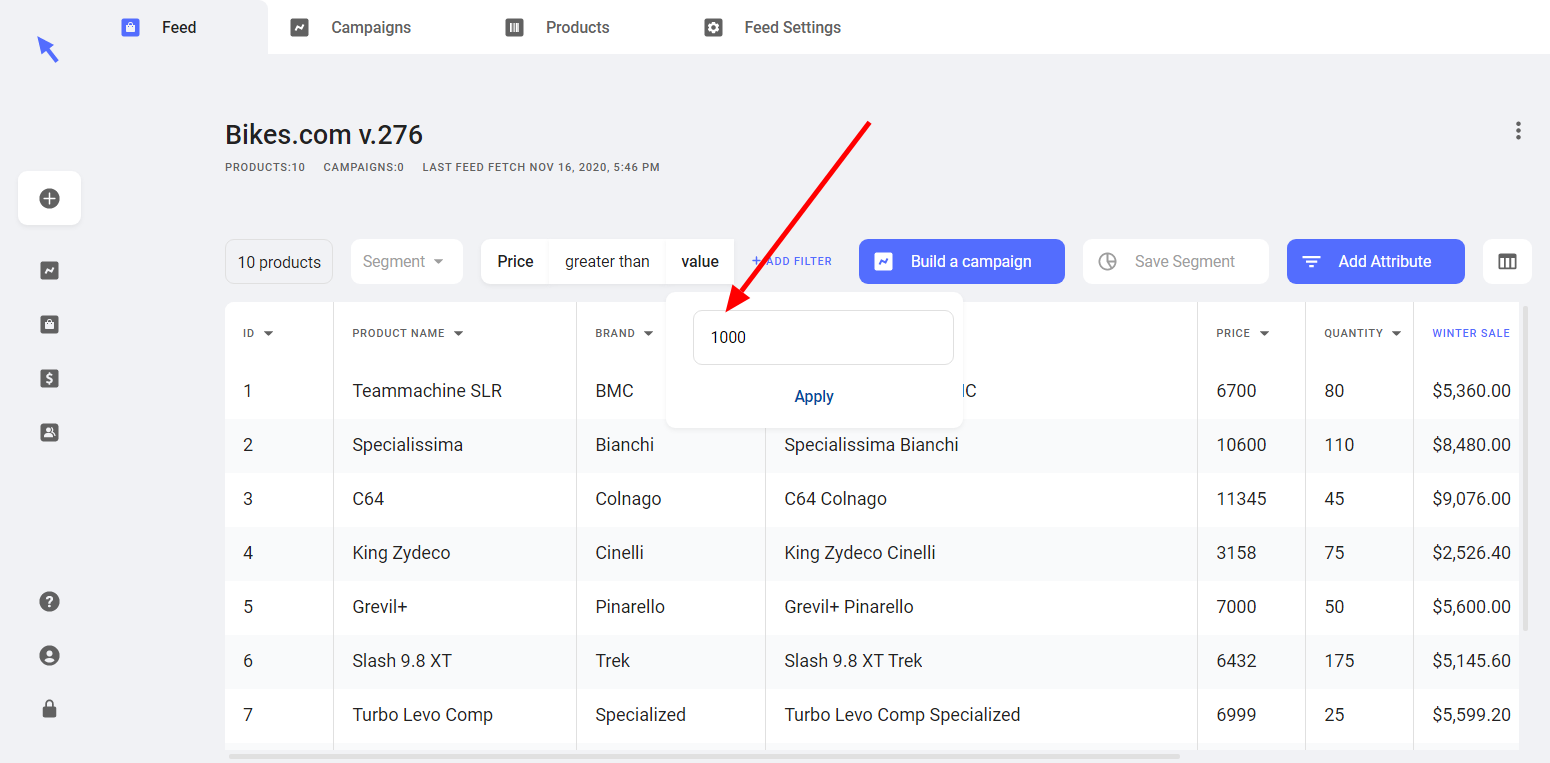
If you choose 'price' this will be a numeric filter, and you can choose to create a segment for all of your bikes whose price is greater than $1,000.
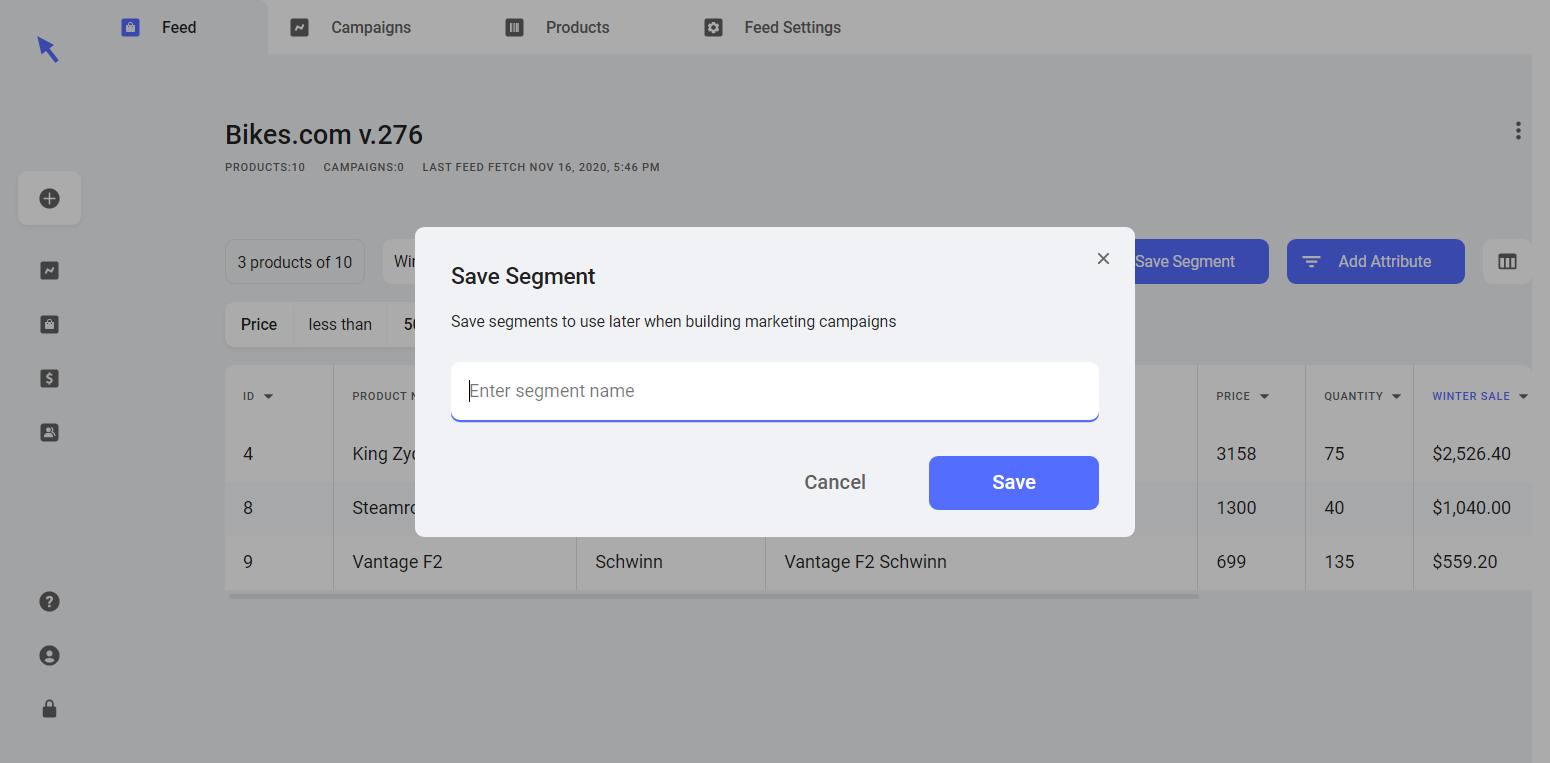
To save the segment, simply click on 'Save Segment' on the right hand side of the screen above your feed.

A new window will pop up where you can enter a name for your segment and click save.
All of the segments you create can be viewed under the 'segment' button on the left-hand side of the screen. Here you can choose to view your full feed, or just a segment that you have created.
Congrats! You have saved your first segment. Now you can move on to creating a campaign based on that segment you created.
BACK TO Ecom Tool